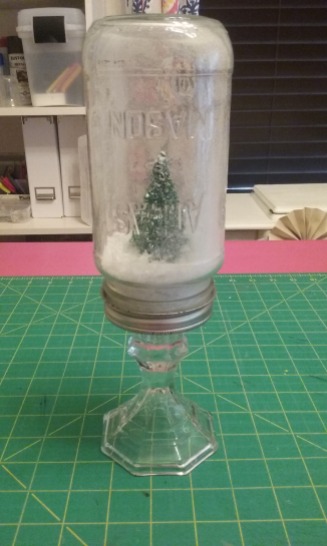
Happy Holidays! I’m sharing this whimsical mason jar snow globe DIY. They are so beautiful in the light! I made quit a few and grouped them together around my home. Read on for details on how to make your own.
Supplies:
If you don’t happen to have any jars saved, you can find them at Michael’s craft store. The smaller ones are everyday value at $1.00 and the larger are $2.99 regular price. I found my smaller ones at Dollar Tree and I saved a few Atlas pasta sauce jars for the larger size.
Next you’ll need the mini trees. You can find a variety of these at the craft store in all kinds of colors and sizes. I picked a few shades of green for myself. Here are a few options from Michael’s. (mini 6 pack on the left/$2.99 and medium 3 pack on the right/$3.19)
Here are a few different options for the base. I always grab these when I find them on sale because I know I’ll be using them for different projects. (I don’t pay over a dollar or two for each.) I was lucky to find a few of the middle ones at Dollar Tree. I like to group the finished jars together so it looks great when you have different sizes and shapes. You can find these at most craft/home stores.
And of course, you’ll need snow and craft glue. All of these products can be found at your local craft store. I found my snow spray and filler at Dollar Tree and the craft glue at Michael’s. Be sure to grab the clear craft glue. I have seen it come in white and black. (Make sure to use industrial strength adhesive for your base, you don’t want your jar coming off the base.)
Instructions:
Hold your mason jar in one hand and with the other take your snow can and hold it about 4 to 5 inches above the opening. Spray a small short burst into the bottom of the jar to add some snow and texture to your jars. (This is a little messy and may get on your hand. Use gloves and wash if you get any on your skin.) Let sit for about and hour to dry.
Once dry, add about 1/4 jar of snow fill.

Next, glue your tree down to the inside piece of the lid. (I used hot glue here to speed up the process.) Once it’s dry, place it in the jar and screw the lid on.
All you have to do now is put a little bit of craft glue around the rim of your base, center it on the lid, and let dry. Once it’s dry you can flip it right side up and start decorating!
These are on my kitchen hutch with my gingerbread tree. Don’t they look great!

Thanks for reading, hope you enjoy this project!
~The Dimestore Gypsy


