DIY

DIY Beer Crate Gift

On my last post I shared one of my gift baskets I made for our “White Elephant” gift exchange. Today I’m sharing the other. I loved them both but I really had fun putting this one together!

All you need is a little rustic crate, beer of your choice, and then fill it with goodies to snack on. I’ve had this crate for a while now so I wanted to find some fun things to fill it with to give as a gift. You can get a plain crate from any craft store and decorate it to your liking. Also check your discount stores for crates. (Ross, Marshalls, etc.) You could use stain or paint or even use a stencil to create a design/picture on the outside. Here’s a few I’ve linked:


10228808
Michaels $12.99


1076637_15
Hobby Lobby $9.99


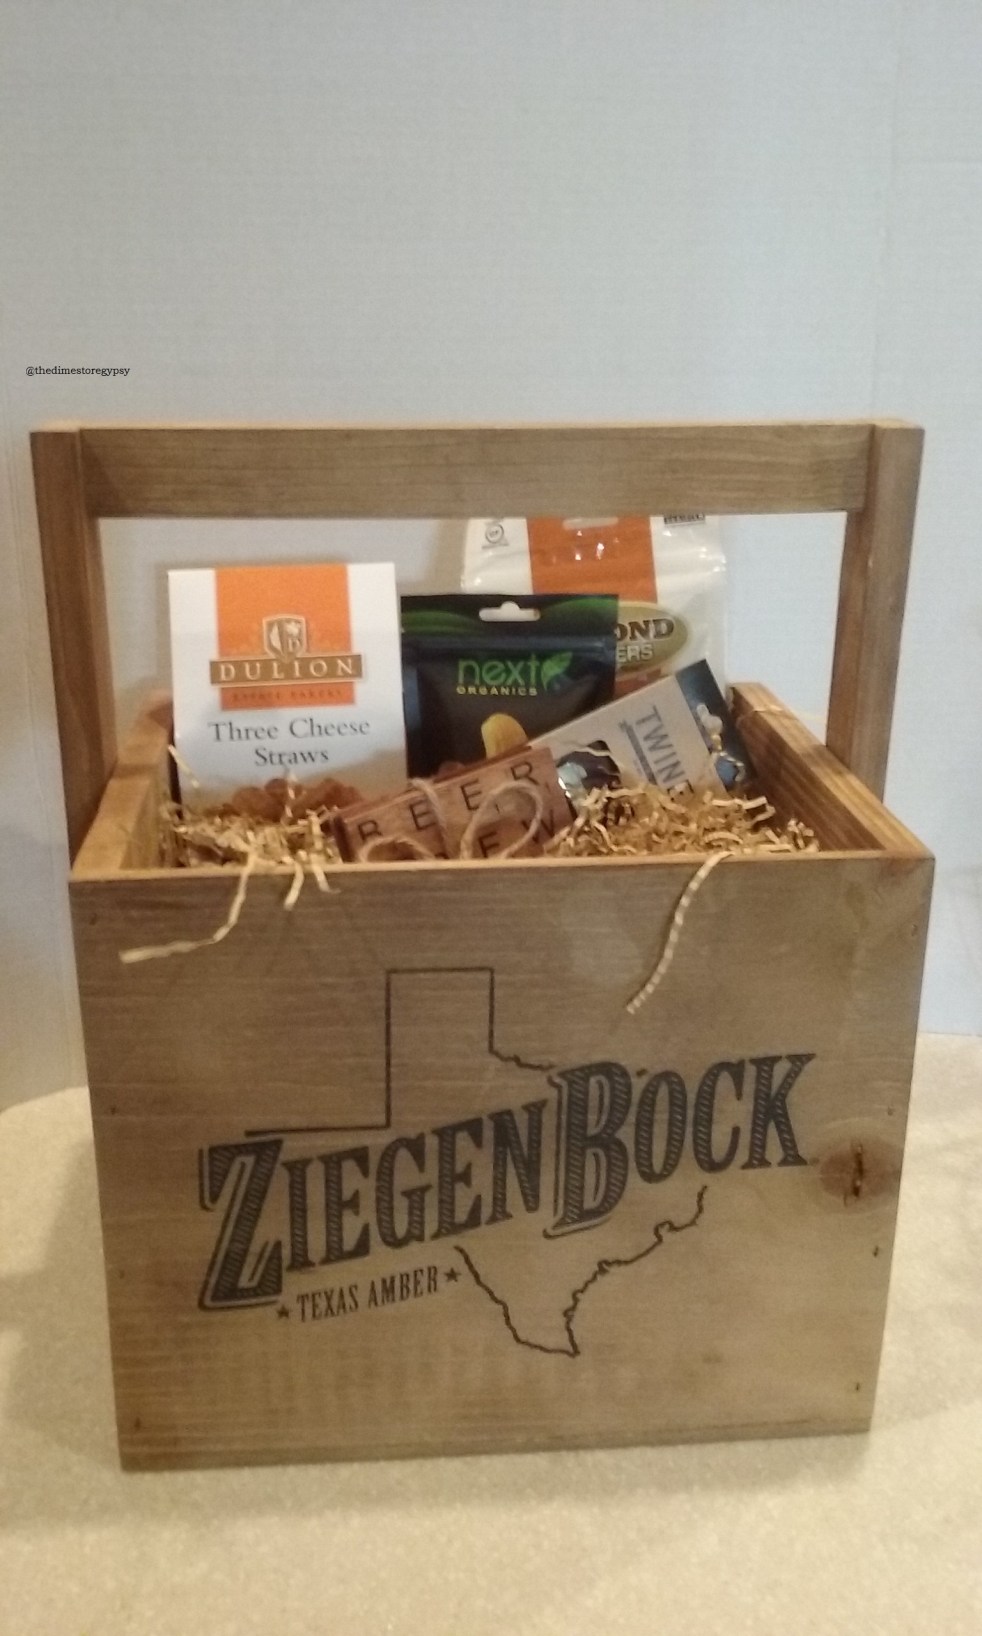
I put two 6 packs in the bottom of the crate and then added some paper fill all around. Next I added some snacks/nuts I found at Marshalls.

20161223_141320.jpg
Cheddar Cheese Straws $3.49, Dark Chocolate Cashews $2.99, Cinnamon Roasted Pecans $3.99


While I was there to get snacks I spotted these fun scrabble tile beer coasters at $9.99/set. I also found this matching bottle opener at $4.99 so I got them both!

20161223_141132


I just added another layer of paper fill over the tops of the bottles and laid these two items on top. I used a shrink-wrap bag and bow I found at Dollar Tree to finish it off and a fun tag that said, “Eat, Drink, and Be Merry”.

This crate was a hit and everyone loved it. I hope this inspires you to create a gift basket of your own for your next occasion!

If you have any questions or comment just drop me a line and I’ll get back to ya!


Thanks for reading,

~The Dimestore Gypsy


DIY

DIY Stationary Gift Basket

Hello! Hope you enjoyed your holiday! I wanted to share my gift “baskets” I made for our family Christmas party. We always do the White Elephant gift exchange each year for the adults so I thought I’d share these fun gift ideas. Not only are they fun for the gift exchange, but these gifts can be made and used for any occasion; Mother’s Day, Father’s Day, Birthdays, etc.

I went to Marshalls with a plan to find gourmet nuts and such to put in the beer crate I was putting together. I went down the other aisles 1st to get an idea for a ladies gift and came across this gorgeous white leather planner and it was only $4.99! I dropped it in the basket because it was definitely going home with me.

20161223_132542-2


As I moved further down the aisle, I spotted the cute wooden mail sorter at $9.99 and the gold polka dot clipboard with notepad at $3.99. This gave me the idea for the stationary gift basket.

20161223_133755 (2).jpg


I ended up stopping at Michael’s and Dollar Tree and was able to find a sassy 2 pack of blank cards, a pocket notebook, a cut writing pen, some paper fill, and a shrink-wrap bag with a bow.

Went I got home I checked my stash and found some glass magnets I had made for a craft fair a while back. I had a few clear and gold glass buttons in my sewing supplies so I used those to make a few fancy paper clips. I bagged these up nicely with some pink cardstock from my scrapbook paper supply.

*(The paper clips, glass pebbles, and magnets can be found at Dollar Tree. For the magnets, just find some small cute images from a magazine, cut them out, and adhere them with some Modge Podge to the pebble. Glue your magnets with some E6000 the back and voila!)


I arranged all the items together in the mail sorter and put a little paper fill in each slot. I bagged it up with the shrink-wrap and added the bow and a fun little Christmas tag.

My sis n law ended up stealing the gift and is super excited to use it on her desk at work!

I hope this gives you an idea on how you can make your own fabulous gift basket that won’t break the bank.  Check back soon for my DIY Beer Crate!

Thanks for reading and Happy Holidays,

~The Dimestore Gypsy


DIY · Holidays

Whimsical Mason Jar Snow Globe DIY

Happy Holidays! I’m sharing this whimsical mason jar snow globe DIY. They are so beautiful in the light! I made quit a few and grouped them together around my home. Read on for details on how to make your own.

Supplies:


If you don’t happen to have any jars saved, you can find them at Michael’s craft store. The smaller ones are everyday value at $1.00 and the larger are $2.99 regular price. I found my smaller ones at Dollar Tree and I saved a few Atlas pasta sauce jars for the larger size.


Next you’ll need the mini trees. You can find a variety of these at the craft store in all kinds of colors and sizes. I picked a few shades of green for myself. Here are a few options from Michael’s. (mini 6 pack on the left/$2.99 and medium 3 pack on the right/$3.19)


Here are a few different options for the base. I always grab these when I find them on sale because I know I’ll be using them for different projects. (I don’t pay over a dollar or two for each.) I was lucky to find a few of the middle ones at Dollar Tree. I like to group the finished jars together so it looks great when you have different sizes and shapes. You can find these at most craft/home stores.


And of course, you’ll need snow and craft glue. All of these products can be found at your local craft store. I found my snow spray and filler at Dollar Tree and the craft glue at Michael’s. Be sure to grab the clear craft glue. I have seen it come in white and black. (Make sure to use industrial strength adhesive for your base, you don’t want your jar coming off the base.)


Instructions:

Hold your mason jar in one hand and with the other take your snow can and hold it about 4 to 5 inches above the opening. Spray a small short burst into the bottom of the jar to add some snow and texture to your jars. (This is a little messy and may get on your hand. Use gloves and wash if you get any on your skin.) Let sit for about and hour to dry.


Once dry, add about 1/4 jar of snow fill.

20161214_115553.jpg


Next, glue your tree down to the inside piece of the lid. (I used hot glue here to speed up the process.) Once it’s dry, place it in the jar and screw the lid on.


All you have to do now is put a little bit of craft glue around the rim of your base, center it on the lid, and let dry. Once it’s dry you can flip it right side up and start decorating!


These are on my kitchen hutch with my gingerbread tree. Don’t they look great!

20161214_120154


Thanks for reading, hope you enjoy this project!

~The Dimestore Gypsy