I’ve been loving the planner craze that’s taking over. I’ve seen so many creative ideas on Instagram and Pinterest from designing the inserts, to all the fun dashboards for decor and supplies. I myself love having an agenda/planner. I can write all my appointments, class work due dates, etc. down and not forget where they are. It just makes my day run smoothly being organized.
My current agenda is plain and about to end at the end of this month so I thought what a perfect time for me to get into this planner craze and get something fun. I was organizing one of my craft table drawers the other day and tucked away at the back was my Amy Brown Art agenda! I remember receiving this as a gift when I was a late teen. I’m a little obsessed with fairies and if you know of Amy Brown Art, you know what I’m talking about! Anyways, I thought…this is so pretty. I must have tucked this away a long time ago because I didn’t even know I still had it.
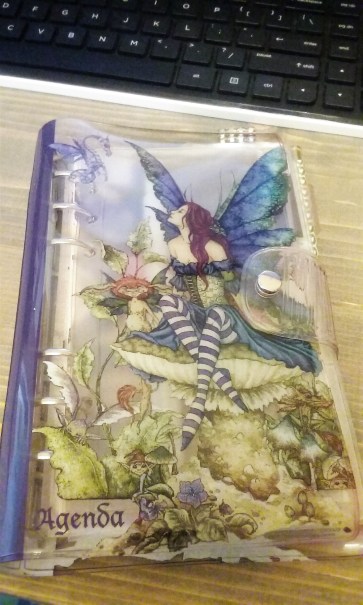
I mean hello, gorgeous! This is perfect. It has an agenda, notes, and phone list section. I watched a few newbie planner tutorials to cover the basics and I was ready to go. First I created my inserts (agenda pages) in Microsoft Word. Did you know if you’re a student you can create a free online account? Check it out at microsoftoffice.com. All you need is a student email address to start.

After doing some research, I found out this is a personal size planner. The pages measure at 3.75 x 6.75. I recommend if you have never created an insert to definitely do your research so you can understand how they print and the layout, etc. It’s not too complicated but it took me a couple of tries before I got them printing correctly. After they printed, I cut them to size and put them in my agenda.
Next, I wanted to create a fun little shaker dashboard insert but I didn’t have a fuse tool. I got to thinking how could I make one without having to go out and buy this tool and then I decided to make one with needle and thread.
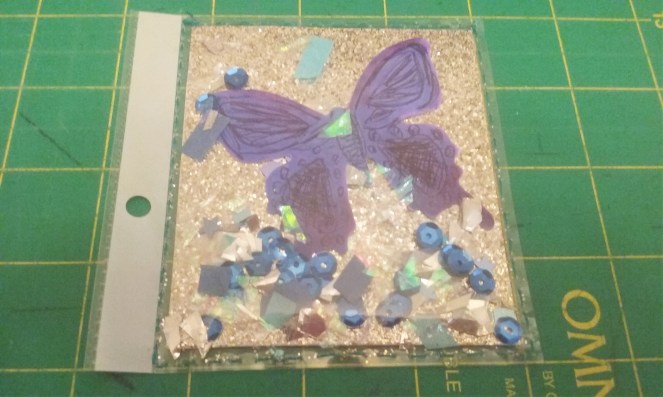
Here’s some instructions on how to make your own.
Supplies:
hand sewing needle
thread of your choice
clear page protector
whatever you want to put inside for decor (paper, sticker, scrapbook decals, picture, etc.)
filler (sequins, small buttons, seed beads, confetti, etc.)
scissors, rotary cutter, or paper-cutter
Directions:
First, insert a sheet of paper into your protector (it makes it easier to cut). Cut the page down to the size you want your shaker to be leaving the hole punched side attached. I made my 4 x 4, with the actual insert area being 3.25in.


Next, take about an arm’s length of thread and thread it thru your needle. Leave about a 4-5in over hang so that when your sewing your thread doesn’t slip off the needle. Knot the opposite end. (This will stop your thread from coming thru). Start at the top left corner and make a running stitch all the way around leaving an opening at the top. When you get to the top right corner, don’t cut your thread. Hold it off to the side so when your done filling your shaker you can close it off.
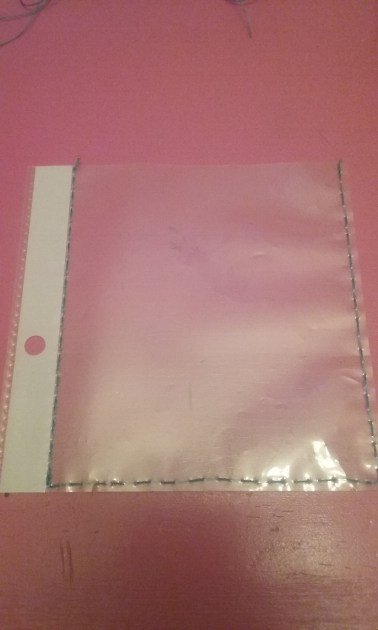
*If you’ve never done this, start at the top left corner. Hold your needle on the under side and push it thru the plastic and then pull up all the way until your knot touches the plastic. You will move over just a little from where the needle came up and you then push your needle down thru the plastic. Pull the needle down thru the plastic and that is one stitch. Continue to do the same thing all the way around. When you come to a corner, you will come up close to your last stitch like an “L” shape and continue the same steps of weaving in and out. When you get to the top right corner, don’t cut your thread. Hold it off to the side so when your done filling your shaker you can close it off.


Now the fun part! Fill your shaker with whatever you desire. Be sure to add all your goodies and then add your filler to the front of the shaker. I used a piece of gold glittered scrapbook paper cut down to 3.25 x 3.50, a butterfly die cut that I colored, some blue sequins, and some confetti from a clearance out confetti popper I found at Michaels.

When your finished filling your shaker, take your needle and thread and continue making stitches until you reach your starting point. Here you will want to finish on the underside and knot off your thread. You can put a dot of craft glue here if you like.
*Newbie-stitch to the end and on your last stitch your needle and thread will need to be on the underside. Your going to loop your thread under the last stitch on the underside. Take the needle and put it thru the loop and pull snugly to create your knot. You can do this twice to secure.
Now you can hole punch your shaker and add to your planner. If you don’t like the plain white side with the hole punches, add a strip of decorative washi tape to the front and back here to create a nice area to add your punches.

Next, I made some fun little embellished paper clips to use for my pages and bills, paperwork, etc.

All you need is some paperclips, stickers/embellishments, ribbon, and hot glue. You can really get creative and personalize your paperclips with spray paint also. Just spray paint them first and let them dry before you add your embellishment. Then add a dab of hot glue or E6000 to your embellishment, lay your paper clip on top and let dry. I ended up using the bottom right jeweled one for my planner.
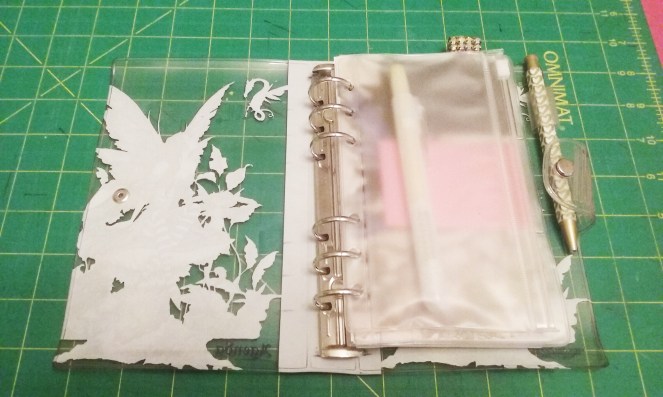
The planner came with a plastic card divider but I just added some sticky notes and a flat paper clip and placed it at the front so I don’t have to dig for them. I backed it with some decorative paper with a pull tab to I can access them more easily.

It also came with a zippered pouch so I put a click top highlighter in here to mark my important dates.
If you’re thinking about jumping on the planner craze, go for it! A lot of craft stores sell planner kits with everything you need to get started. They can become pricey depending on what you get so be careful…it’s addicting! I know the dollar spot at Target always has cute planner inserts, binders, sticky notes, etc. for planning that are more budget friendly.
Thanks for reading and if you have any questions just leave me a message or comment. If you decide to make a shaker, I want to see! You can find me on Instagram at dimestoregypsygal.
Thanks for reading,
~The Dimestore Gypsy