Hi friends, It’s been forever! A lot has changed in the past month….I recently started working full-time again and my blog/creative time has been put on the back burner. I sure do miss having my craft & blogging time! Now that I’ve gotten into a routine and the craziness has slowed down a bit, I would like to start making time to share my crafts and stories with you again.
So why not start with a craft for one of my favorite holidays…Halloween! I found these cute, vintage Halloween images online and thought they would be fun hanging on my little black Halloween tree.
All you need is a few printed images, some self laminating sheets from the dollar store, and a little bit of ribbon to make these fun little hanging cards.
To make these cards, start by printing out your images at about 3 x 5 size. Follow the simple instructions on the self laminating sheets and trim off the excess. Be sure to leave a small 1/8 in border so your sheets stay sealed. Punch a hole at the top of the card and string your choice of ribbon thru. That’s all you need to make these cute little cards!
There’s so many ways to use these cute little cards…scrapbooking, planners, attach them to cute goody bags, or even use them as postcards/cards! I hope this gives you some ideas for ways you can add to your Halloween decor with just a few inexpensive supplies.
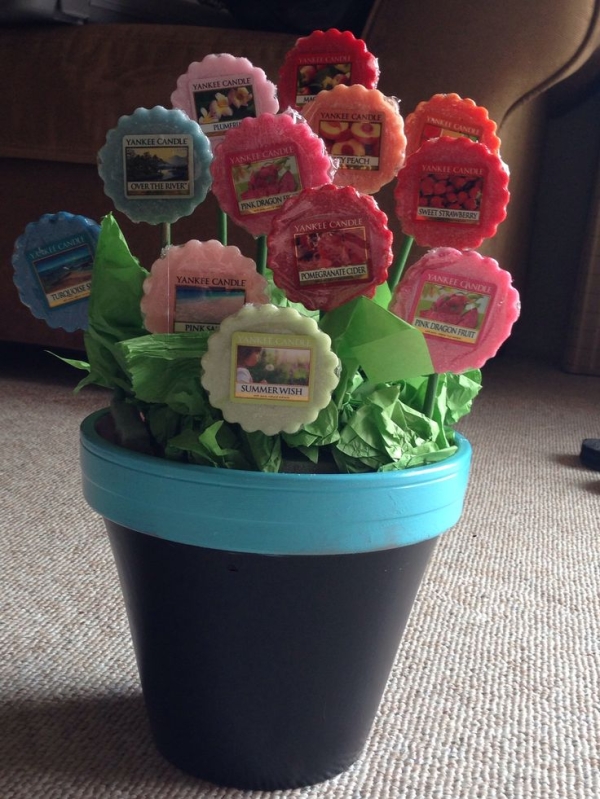
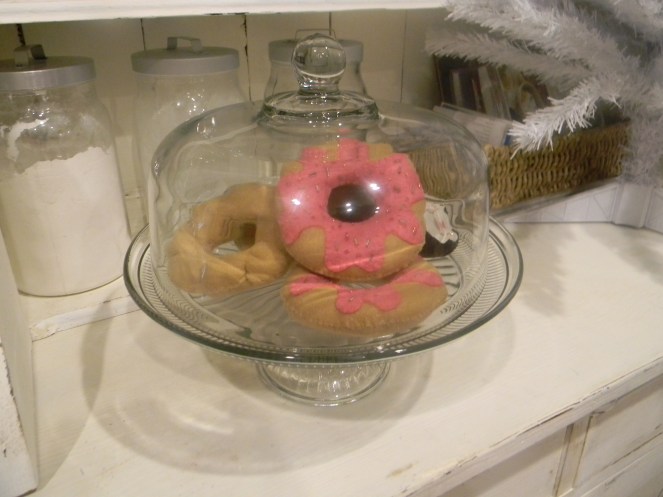
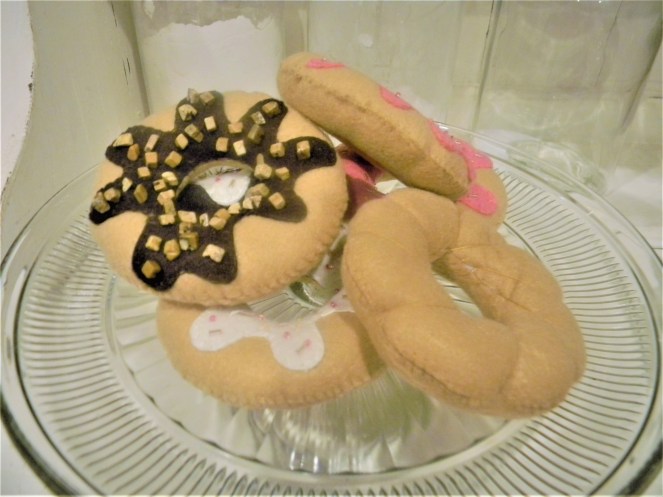
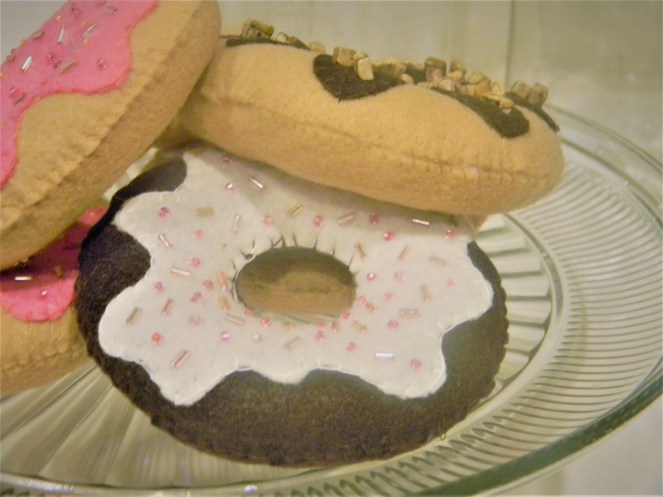
Valentine’s Day always reminds me of chocolates and sweet treats. This year I came across the cutest tutorial for felt donuts. These make a super cute display and they won’t add to your waistline!
All you need is some felt for the donut base & “icing”, fiberfill, thread & small needle, and beads for “sprinkles” & “nuts”.
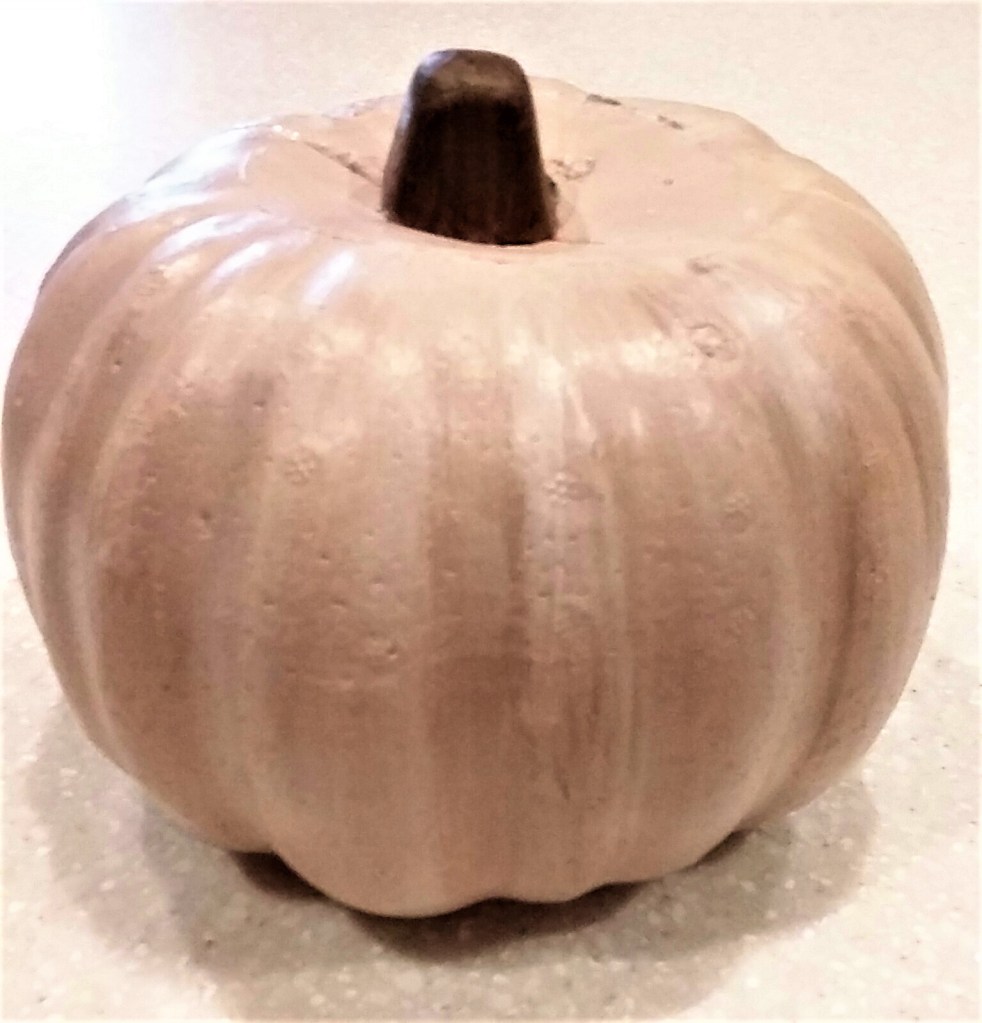
I’ve finally busted out the fall decor and pumpkin everything! I was wanting a few more faux pumpkins (because you can never have enough, right) for my mantle and I remembered seeing them at the dollar store a few days ago. They are the brightest shade of orange and I thought maybe I could paint them to match my home décor.
So that’s exactly what I did!
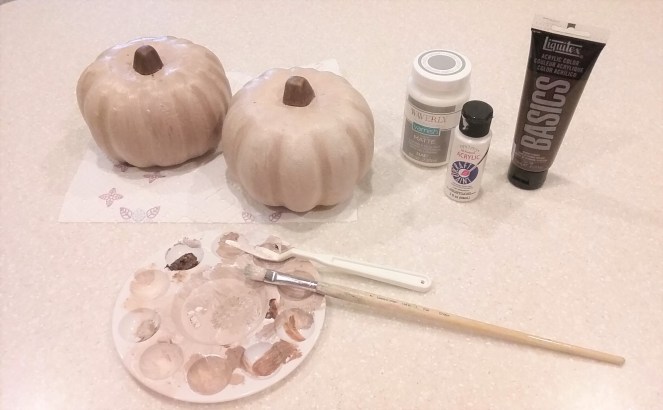
I mixed a little of brown and white paint to get the color I was wanting. Then I applied 2 coats with about 10 minutes of drying time in between. I went back and added some dimension with a slightly darker shade in between the segments. After they were completely dry, I added 1 coat of matte varnish to protect the paint from chipping.
Here they are completely dry with a bit of Spanish moss around the stem!
I just love the way they came out and they look great up here on my kitchen hutch!
This a fun and inexpensive way to add some fall touches to your home. You can paint them whichever color you like and get pretty creative with these. I hope you enjoy this little project and I’d love to see how you incorporate these into your home decor!
Hi guys! Boy is summer in full effect here…toddler, teenagers, babysitting, & junior all-star baseball practice/tournaments. Whew! Just a few weeks in and I’m exhausted lol!
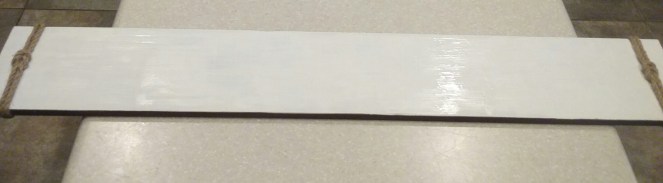
I was out and about shopping this past weekend at one of my favorite discount stores. I spotted this lake house sign in the clearance area and would you believe it was marked down to .65 cents? I kid you not, I couldn’t believe it either. There was nothing wrong with it so I brought it home with me and figured I’d find somewhere for it.
I planned on a lake house theme for my sons room, but now he no longer wants that…teens, go figure!
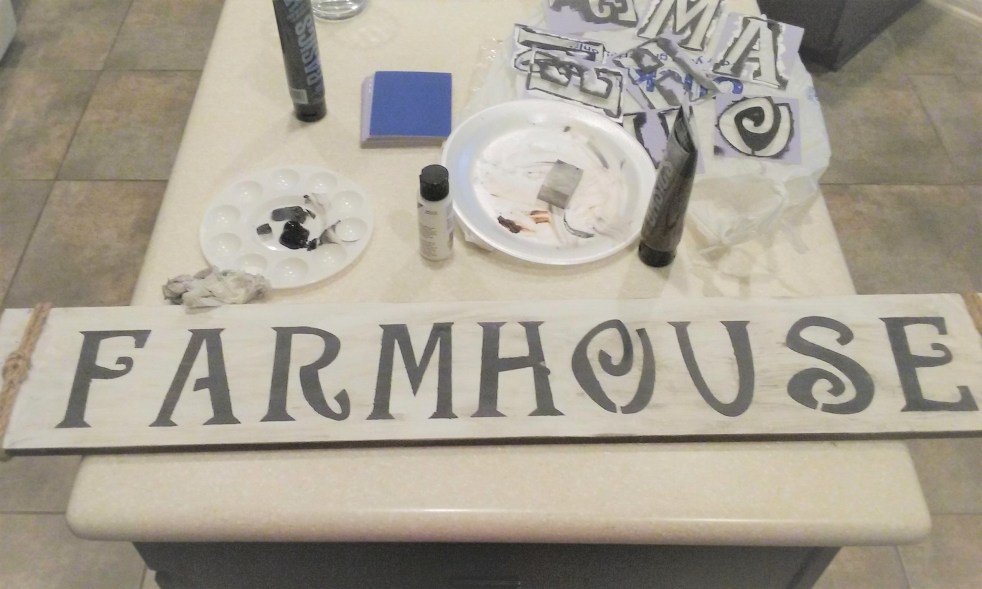
So I have this sign and because the price was so low, they cannot take it back. It got me thinking how else I could use it. I have been wanting a farmhouse sign to hang in my kitchen for sometime and I thought why don’t I just use this and paint over it…so I did!
I used some basic white craft paint and coated the board about 3 times until everything was covered.
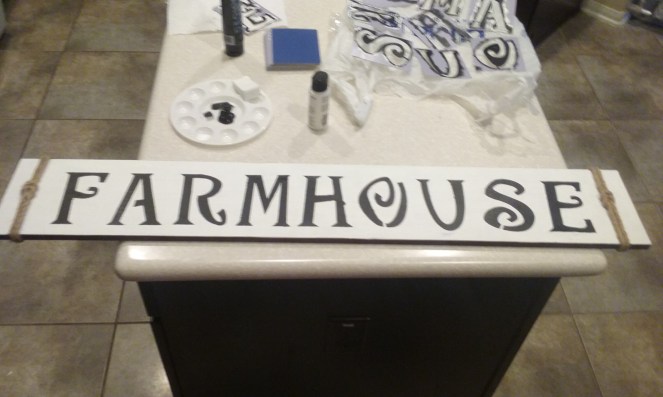
After it was dry I used black acrylic craft paint and letter stencils I had on hand for the wording.
I let that dry for about an hour and added a black wash to it for the effect of dirty, weathered wood. (check out how I did it here)
I just love how it turned out and I think it looks great here in my kitchen! Let me know what you guys think!
Hello all! So my brother and sister-in-law found out they were expecting again and I got the honor of hosting their gender reveal party! Here’s a few pics from the big day.
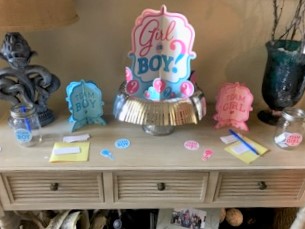
For my entry table I made a voting station for the guests. We had them write their name on a piece of paper and then place it in the jar of their guess. Once the reveal was done, we picked a name from the winning jar for a door prize.
I hung an ultra sound pic and some pink and blue confetti from my branches I keep here year round.
For the mantle I made this cute onesie banner and paper fans from scrapbook paper. The “BABY?” sign is from a piece of dollar store foam board and craft paint.
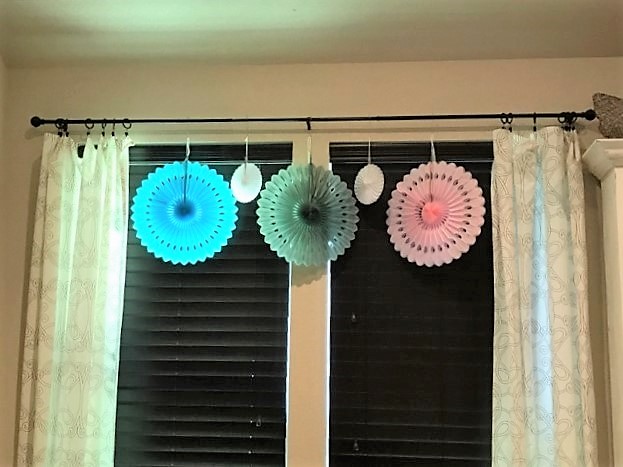
I found some cute tissue paper fans from the dollar store and hung those in my kitchen for a colorful, festive display.
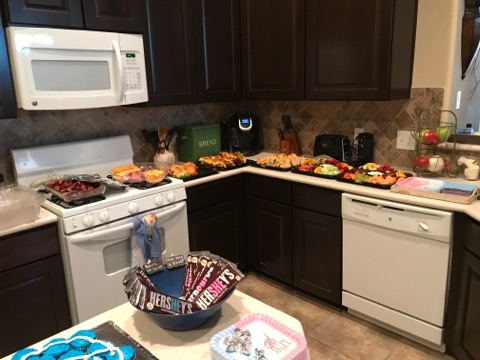
The cupcake rattles was a DIY that I had seen different versions of online. One rattle was vanilla and the other chocolate. I hand frost these the most basic way (with a butter knife) and then arranged them on the board. After that, I placed some white vanilla icing in a zip-lock bag, cut the tip, and used it just like a piping bag to draw the rattles on the tops of the cupcakes. I found some ribbon from my stash and made a bow and placed it right on the base of the circle.
For party favors, we colored some Hershey bars pink and blue and arranged them in a bowl next to the cupcakes for everyone to take.
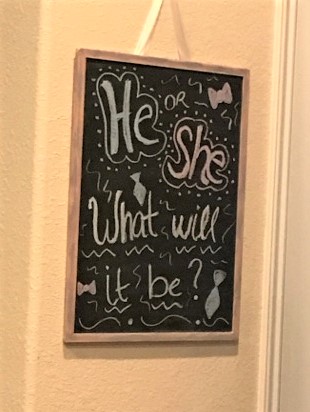
A little fun chalkboard art!
For the outside area I had a white tent set up and we made a tissue pom-pom “chandelier” that we hung in the center. Both sides had the cutest pink and blue tissue tassel banner swag.
We used white table covers and mason jars filled with colored crinkle paper and straw picks.
We had a lot of kiddos at the party…moonwalk for the win!
drink station and game/prize area
A friend of mine found the cutest pink and blue chevron “baby bingo” and “is the price right” cards for games. Be sure to check these sites out for your party needs, they have the cutest stuff!
Reveal Box
It’s a Girl!
So, we’ll be welcoming another baby girl into the family later this year and we couldn’t be more happy or excited!
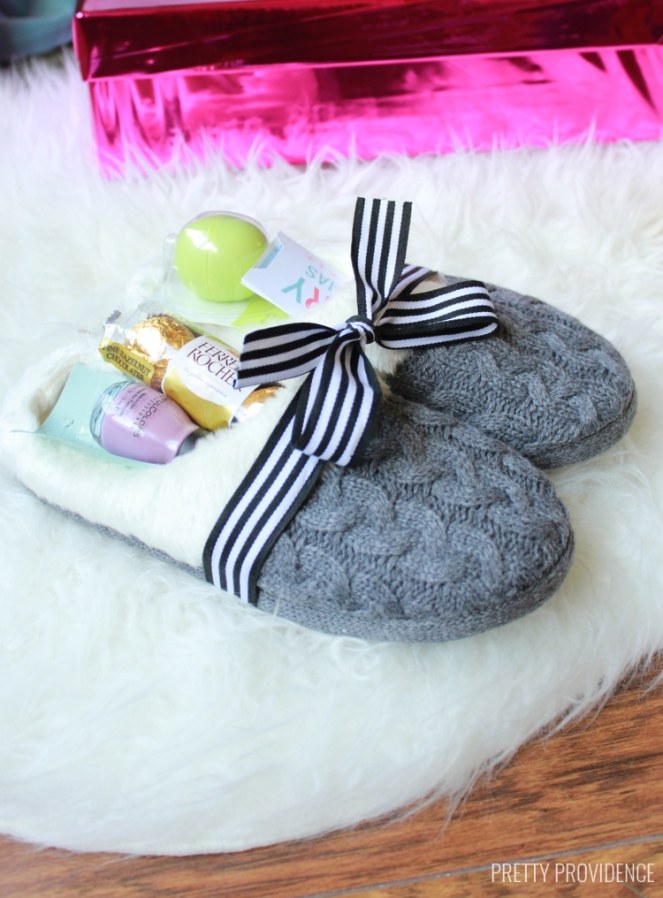
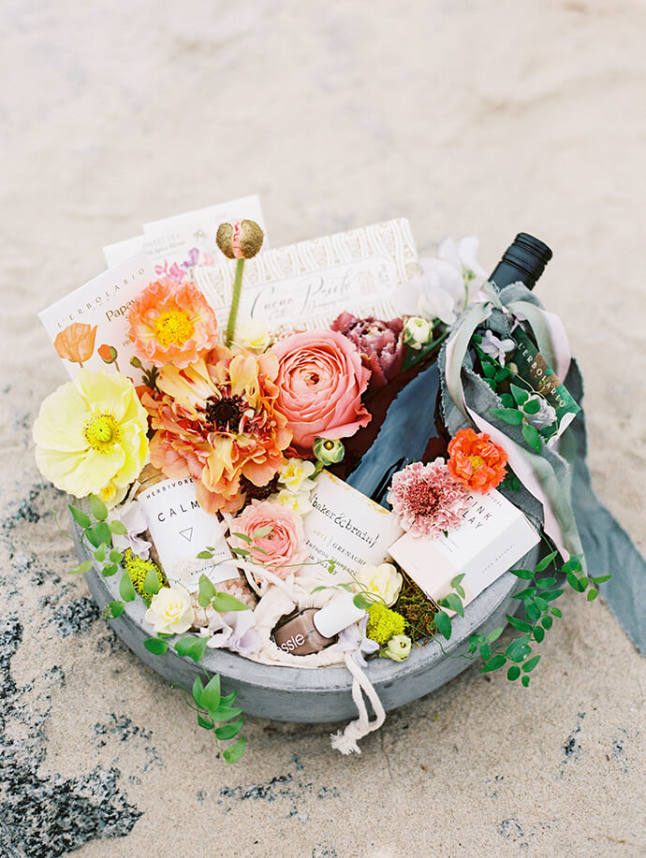
Hey guys…happy Friday! I just wanted to share some of the cutest Mother’s Day gift DIYs I have found this week on the web. If you’re still searching for the perfect gift, check these out and give one a try!
Spring is right around the corner and I am sharing this cute birdcage décor DIY. It’s so simple and really easy. All you need is a cage of your choice (use one that has smaller spacing between the bars so your potpourri doesn’t fall thru), and some potpourri vase filler. That’s it!
To assemble: open your cage, fill with the potpourri of your choice, (if you like, you can mix in some decorative balls/pod fillers too) and close the lid. Now you can display your birdcage wherever you like!
I’ve linked some cute cages I found and some potpourri and ball/pod fillers for you too!
*I used a medium-sized cage, 1 bag of ball/pod fillers, and 1 bag of potpourri (keep in mind the larger the cage, the more filler you will need)
Have fun putting yours together and send me a pic if you decide to make one. I’d love to see how you style yours! You can find me on Instagram and Pinterest @thedimestoregypsy.
Hello! Today I wanted to share my self-laminated Valentine card embellishments with you. They’re fun to make and with a few craft supplies, you can customize these to your liking.
All you need is some scrap craft paper, glitter glue, stickers, etc. and some self-laminating sheets. I happened to score 2 packs of the 5 x 7 size from the Dollar Tree but you can find these at any store that carries laminating products.
The self-laminating sheets are easy to use and will make your embellishments last a long time. You just center your project on the hard side and the back is peel and stick. It comes with instructions and shows you exactly how to seal your craft.
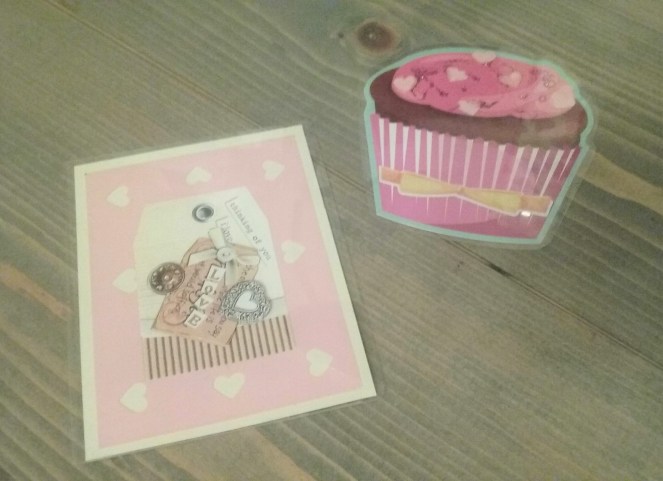
For the love tag, I started with a cream 4 x 7 piece of cardstock for my background. I then cut a piece of pink scrap paper smaller than the background and added a couple of stickers to the center. After, I went around the edges making hearts with my mini heart puncher and affixed it the background piece.
The cupcake card was actually a card so I just cut it in half and decorated it. I added glitter glue and the pink hearts from the previous punched card. You could create a cupcake with a few scraps of paper if you like this one.
For the larger card I used a page out of a dictionary. I love using dictionary pages in my crafts and decor! You can find them just about anywhere. I found mine at my local library. They sell books for like .50 cents so I’m always there getting old books. It’s just something about those old, worn out pages that I love. Just add a little glittered heart cut out or punch and you have a cute little card.
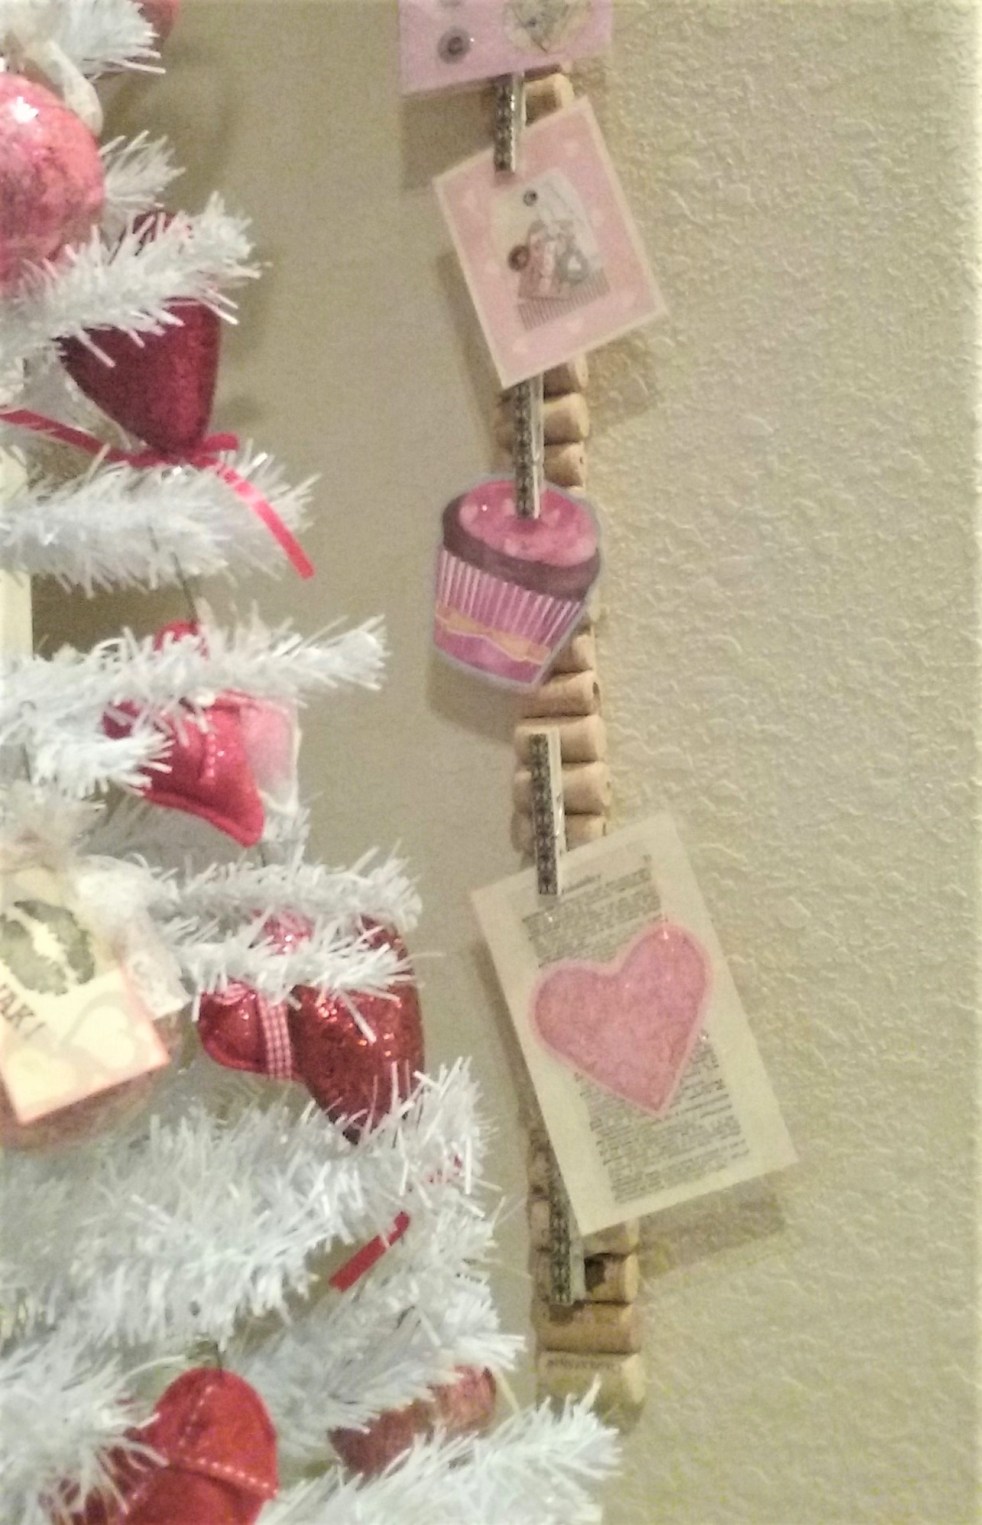
There are so many possibilities on how you can use these. Punch a hole at the top and add some twine and you have a cute little ornament for your Valentine tree! You could also use these in your planner…add some sequins to the front before sealing and you have a shaker dash-board. Also, these would be fun as a gift tag, or a love note for your special someone. Leave one on the night stand for your love to find or even drop one in your kids lunch to find at school.
My cards are hanging right next to my tree. I display extra Valentine cards here too during the holiday and it makes a pretty festive display.
Feel free to use these if you’d like. I’d love to see how yours come out. You can find me on Instagram @thedimestoregypsy for home decor inspiration and more.
First post of the New Year! I hope everyone enjoyed the holidays. We recently celebrated my daughter’s 1st birthday and I’m so excited to share all the details and decor. I love planning and hosting so naturally I had to go all out!
For invitations we used Vistaprint.com. They have a great selection of invitations that can be printed from your home or printed and mailed to you. I chose to have them printed and mailed and they did a really great job! Everyone loved them. I’ve linked them below.
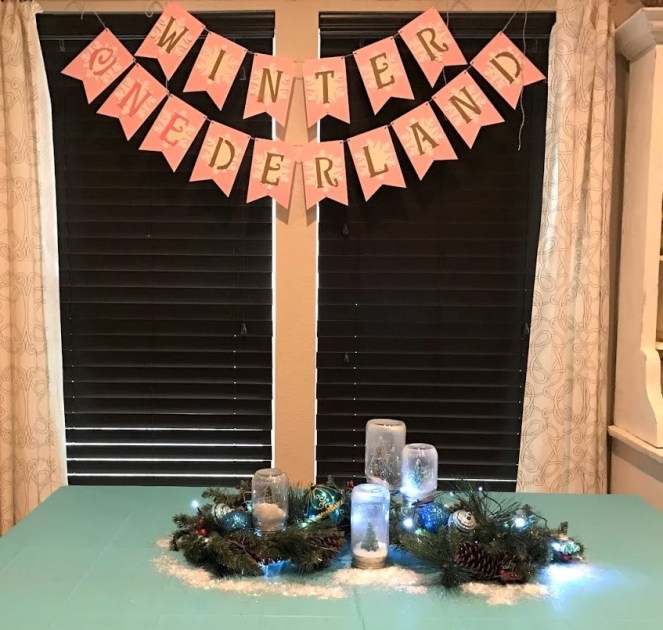
Here’s the style I used. There are 3 different color options and I chose the pink. You are able to edit the wording, pictures, etc. however you like. I took the photo insert off so I could have one large snowflake and we edited the wording under Winter Wonderland to say: Oh what fun! Our little snowflake is turning One! They came with white envelopes for free or the option of matching envelopes for an additional cost. I found a coupon code online and ended up paying around $.60 cents per invite with free shipping.
I created all the decorations using the Recollections Strawberry Cream cardstock value pack from Michaels craft store. It has 5 different shades, comes with 50 sheets total, and It’s priced at an everyday value at $2.00! I’ve linked it here for you.
Recollections Strawberry Crème-Michaels.com
*I found a 25 pack of snowflake cutouts also from Michaels but these were seasonal and are no longer available.
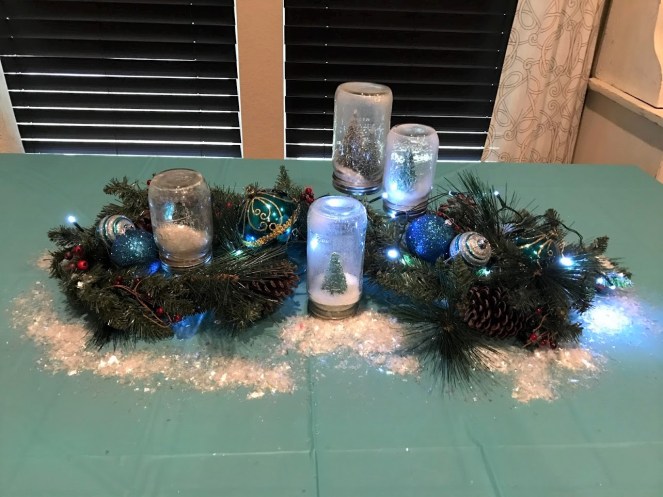
Check back a few posts to see how you can make these magical snow globes I used in my table centerpiece!
I always decorate my kitchen with gingerbread during Christmas and this was just so cute with all the other decorations.
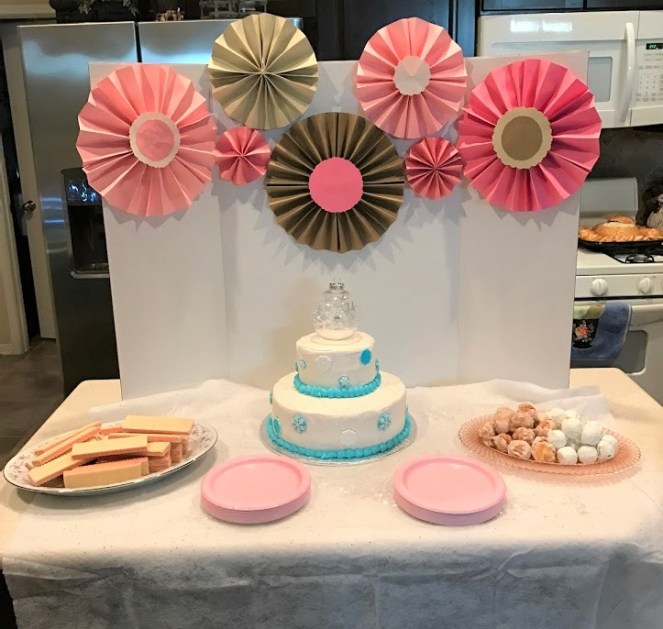
For this backdrop I used the cardstock to create some paper fans and glued them to a white back drop from Dollar Tree.
In keeping with the theme I chose a white cake with white butter cream icing and some edible snowflake accents. I ordered from our Wal-Mart bakery and it was so moist! The cake topper was a clear ornament filled with faux snow and a dye cut snowflake from some of the leftovers I had. You can wipe the bottom off and it becomes a keepsake ornament. Just add the birth details with a sharpie and hang it on your tree with some pretty ribbon!
I saved the tutu from our cake smash photo session and used it as the high chair skirt.
I put together these dainty little sitting table centerpieces with the Recollections silver glittered die cut snowflakes and clear rhinestones I found at Michaels. They were 12 in a pack, with a mix of large and small. I’ve linked the exact ones below.
Michaels.com
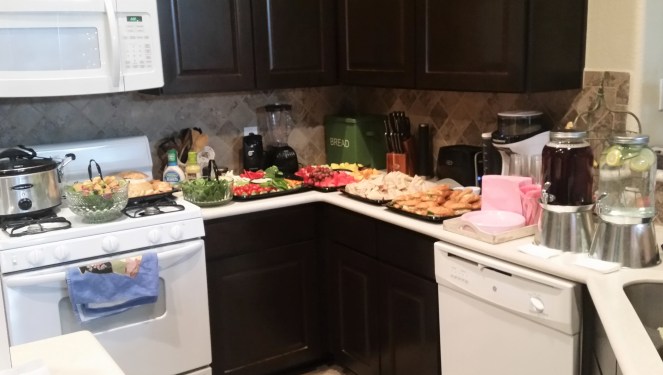
I wanted a deli style lunch so we had a mixture of catered and homemade goodies. From the Kroger deli I ordered mini chicken salad croissants, assorted ham and turkey tea sandwiches, a fruit tray, a veggie tray, and a spinach and artichoke dip bread bowl.
I ordered a couple of gallons of the Zuppa Tuscono soup from Olive Garden for something warm and I have to give many thanks to my stepmother for bringing one of her friends awesome cheese balls (this is so good everyone is literally asking for it at every party I’ve had), cranberry chili meatballs, and these delicious salads!
We had cake for dessert along with strawberry wafer cookies and donut holes.
For the drink station I used my cute little mason jar drink dispensers that I found this summer at a discount shop. They really came in handy for the sweet tea and cucumber lemon water I served.
I used an old chippy tray to hold all the napkins and serving ware right next to the food.
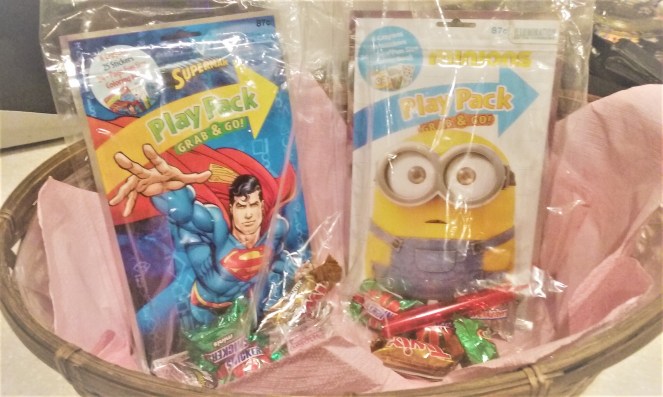
For our party guests I put together these goodie bags with Grab n Go Play Packs, a few pieces of chocolate candy, and a snowflake bubble wand. The play packs are really handy and they come with an activity book, a sticker sheet, and a small set of crayons. You can find these at Wal-Mart, Target, etc. in a variety of characters. They’re relatively inexpensive at $1.00 each. I just lined a basket with some tissue and arranged the goody bags here for the kids to grab.
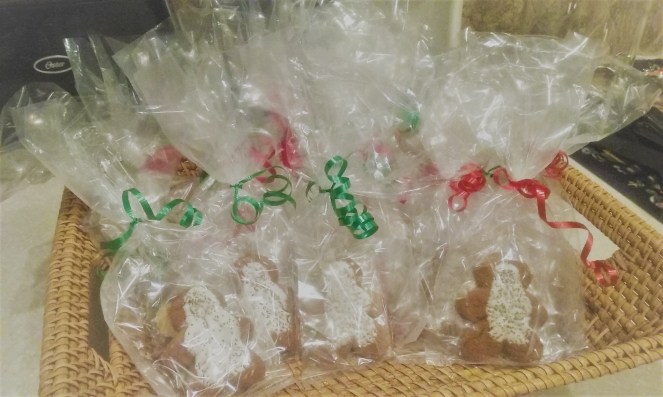
Iced gingerbread men all wrapped up as a party favor for everyone!
I used the Little Debbie gingerbread snacks as party favors. All you need is some loot bags and decorative ribbon and you have a cute, in-expensive favor. Arrange them in a basket and put them near the door so when your guest leave they can take one with them.
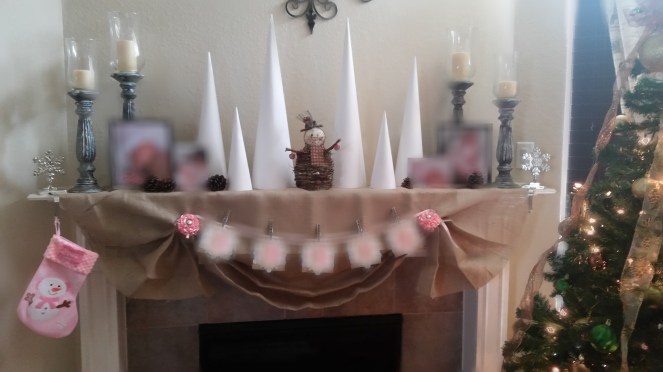
Christmas tree with birthday gifts by the fireplace.
For the fireplace I used the Wal-Mart Creative Cuts 2 yd. piece of burlap as an overlay. I then added baby photos, pinecones, DIY poster board tree cones, and a name banner pinned with flower ribbon brooches.
A few fun game ideas we used that you can play too!
We are so thankful for this little blessing and couldn’t be happier! Thanks for reading along and I hope this gives you some inspiration for your next party.
On my last post I shared one of my gift baskets I made for our “White Elephant” gift exchange. Today I’m sharing the other. I loved them both but I really had fun putting this one together!
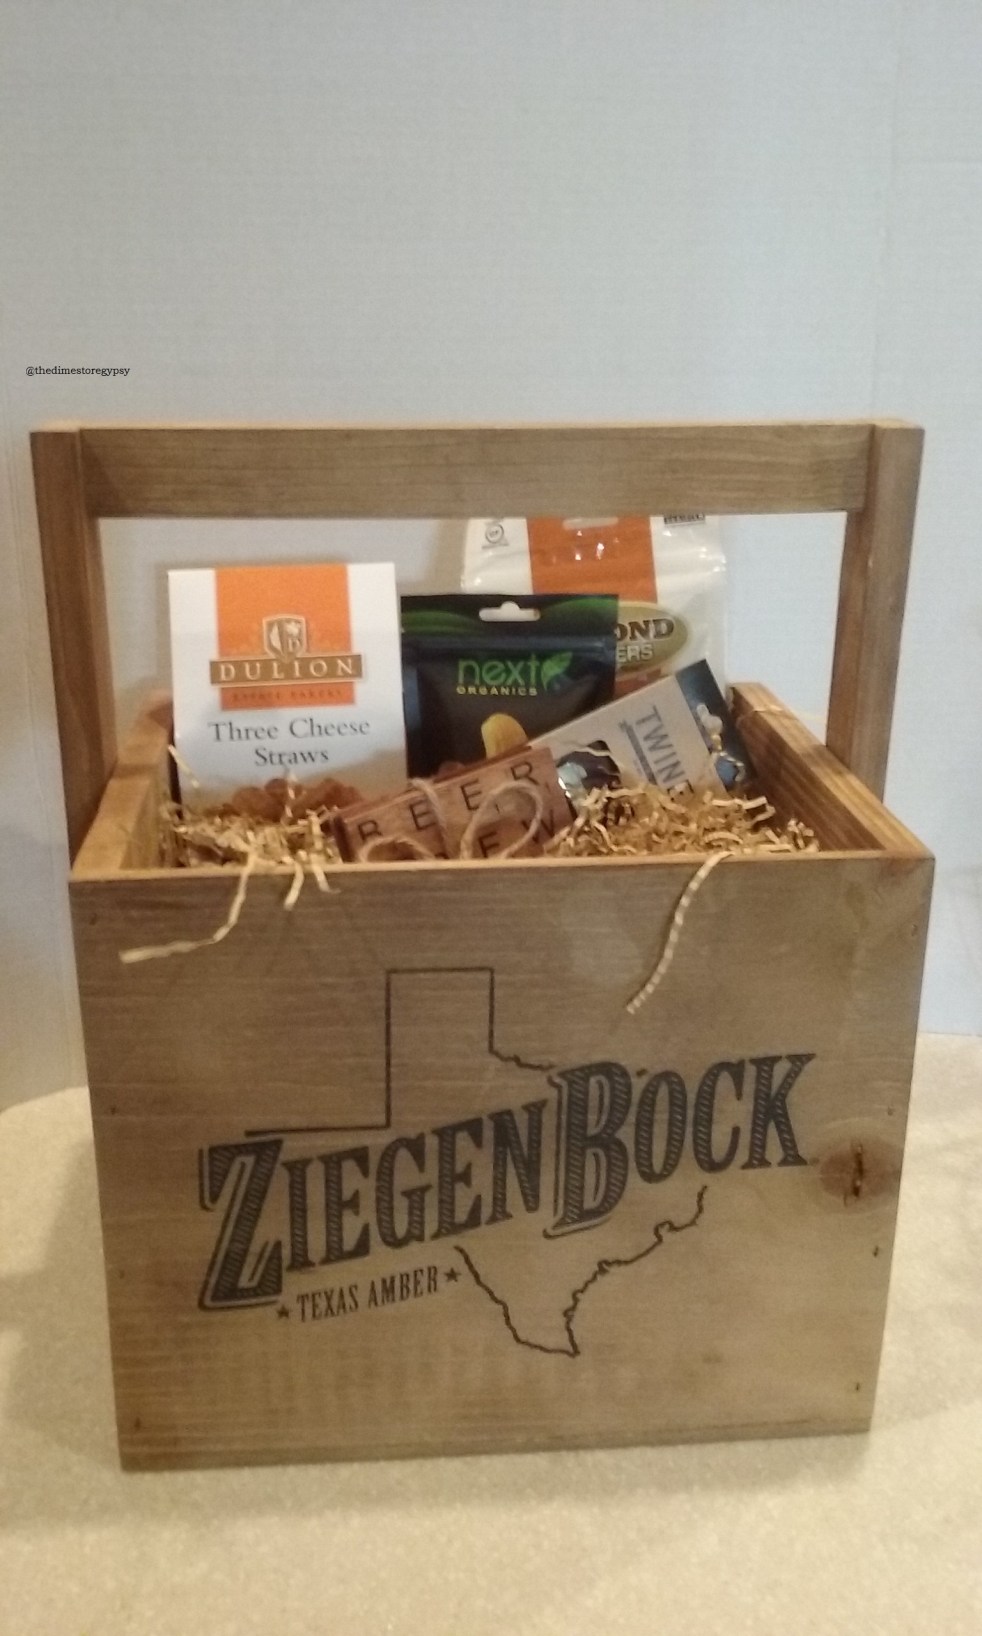
All you need is a little rustic crate, beer of your choice, and then fill it with goodies to snack on. I’ve had this crate for a while now so I wanted to find some fun things to fill it with to give as a gift. You can get a plain crate from any craft store and decorate it to your liking. Also check your discount stores for crates. (Ross, Marshalls, etc.) You could use stain or paint or even use a stencil to create a design/picture on the outside. Here’s a few I’ve linked:
While I was there to get snacks I spotted these fun scrabble tile beer coasters at $9.99/set. I also found this matching bottle opener at $4.99 so I got them both!
I just added another layer of paper fill over the tops of the bottles and laid these two items on top. I used a shrink-wrap bag and bow I found at Dollar Tree to finish it off and a fun tag that said, “Eat, Drink, and Be Merry”.
This crate was a hit and everyone loved it. I hope this inspires you to create a gift basket of your own for your next occasion!
If you have any questions or comment just drop me a line and I’ll get back to ya!


 drink station and game/prize area